Oh, boy is it HOT!! We've had several days at or almost 100 degrees and I'm a cold weather girl. Always have been. This time of year has me yearning for fall weather.
I can't wait for Louisa and her mommy and daddy to get here. They're coming to stay for a couple of days. What are you up to?
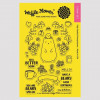
I've been up to bear cards again. This time a cute birthday bear and that same bear couple from my last post, but I got to color them this time. I figured out how to take out the color of the image with a bit of trial and error and a tip or two from a couple of videos.
The birthday bear is highlighted with what I'm calling a background spotlight. It's super easy to do and adds a fun element to your card.
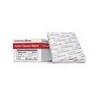
The masking paper makes the creation of a spotlight really easy. I'm sure you could use a lightweight paper, but the masking paper has the added convenience of an adhesive that's easy to remove.
Masking paper is also really thin making it so easy to glide over with the applicators.
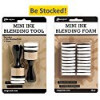
The key here is to use a light touch with the distress inks, so that you can build up color. If you start with a heavy hand you might get way too much color for your liking. I'm sure you don't have to ask how I know that. Let's just say blotchiness is not pretty!
I mentioned that the masking paper is lightweight, but it's also strong enough to use a couple of times. I stuck the same piece to the inside of my card.
And then stamped my sentiment and another birthday bear in that background spotlight.
Don't throw away the trash (oh, excuse me: the negative space). It works great to leave the circle space open, but cover the area around it, so the stamping just shows in the spotlight.
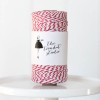
I just love this beary sweet couple. They were fun to color too! I split them apart and created a fold-over card using twine to hold it closed.
The polka dots on the front and the squares inside were created using stencils, inks and stencil brushes. So soft and pretty.
I've got the bear couple for you, if you would like to color them too.


